HOWTO: Create a custom font material
In this tutorial, you will learn how to create a font material that can be used to perform custom shading for text components in your game. Follow these steps to prepare a simple material that uses a texture as an overlay for the text characters.
1. Create a Text Render or Label
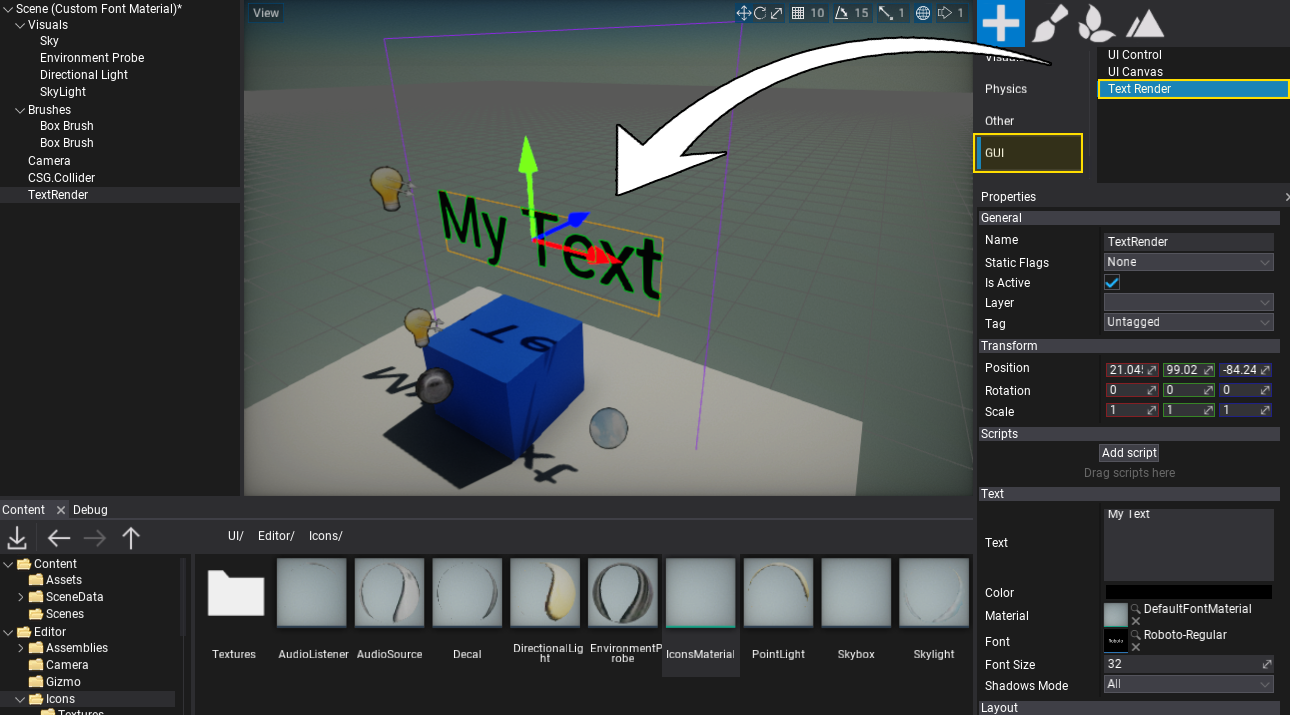
The first step is to add a Text Render actor or Label control (with UI Control and UI Canvas).
2. Create a new material asset
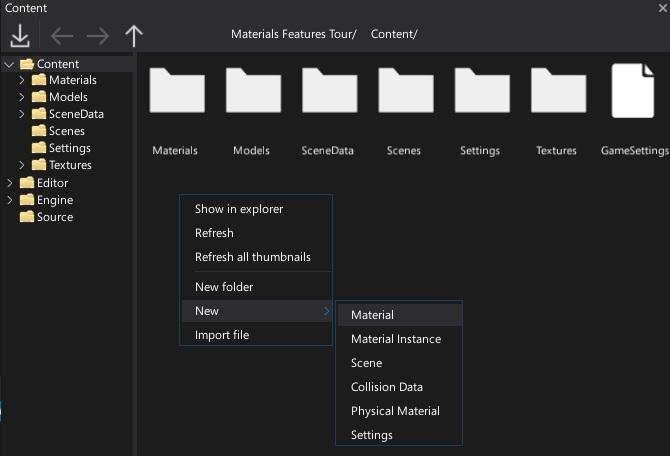
Right click in the Content Window and select option New -> Material -> Material. Type a name and confirm with Enter. Double-click on created asset and start editing material.
3. Create a texture parameter named Font
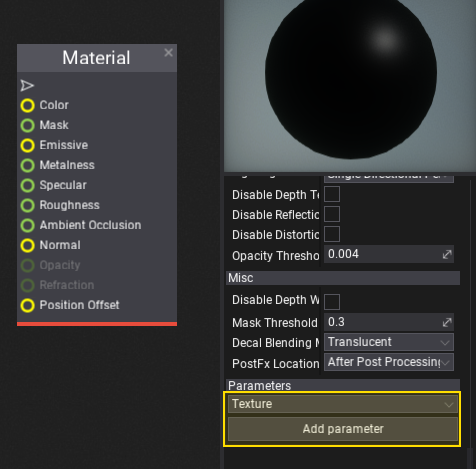
Scroll down the material properties panel and select the new parameter type Texture, then press Add parameter. Next double-click on a label with created parameter name and rename it to Font (Flax uses a parameter named Font to bind the font atlas texture during rendering).
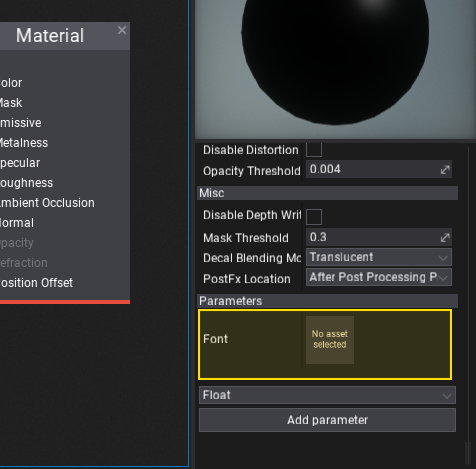
4. Setting up the material graph
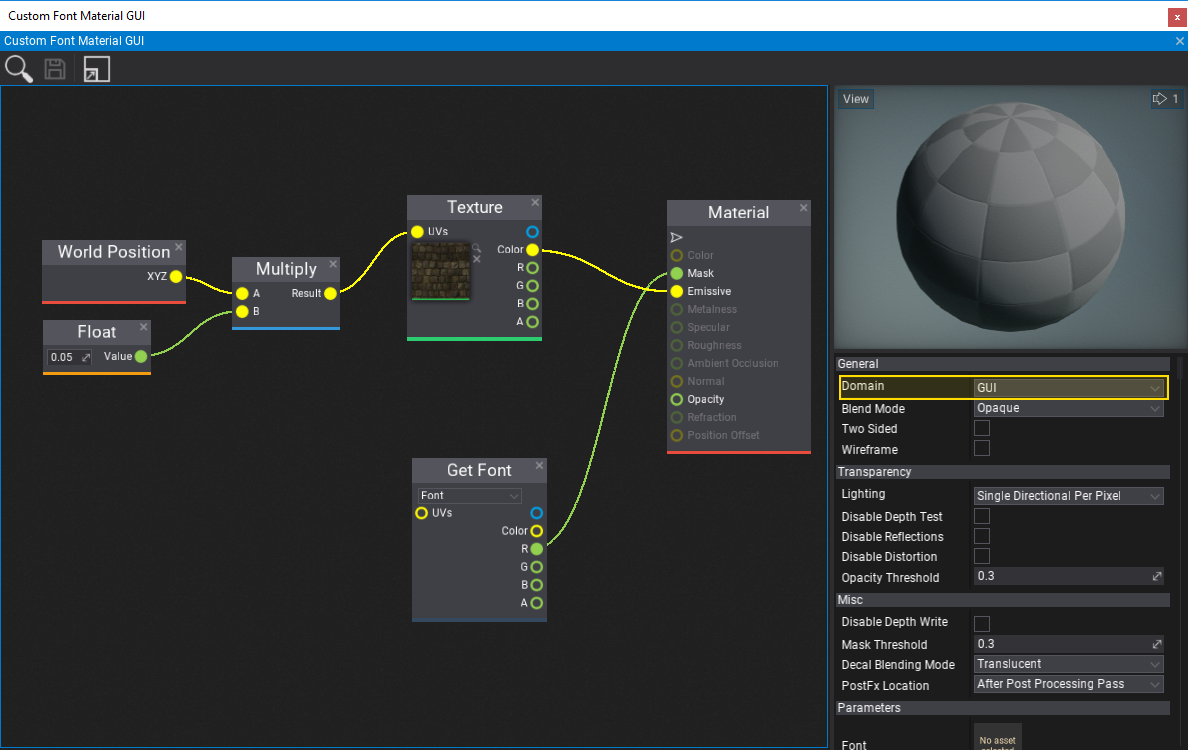
In this step you need to create a complete material node network based on the following screenshot. To learn more about creating materials and using material parameters see the related documentation here.
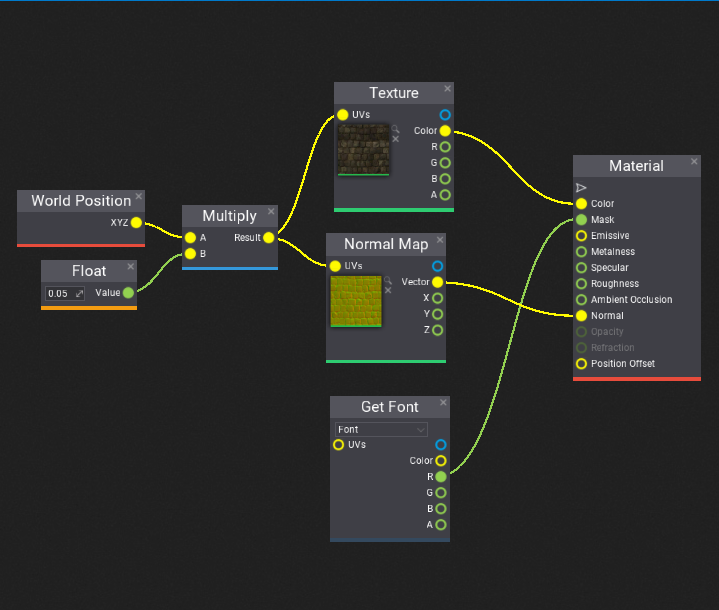
The created material uses an overlay texture and font character textures to render glyphs.
If your material will be used in 2D GUI (not Text Render) then set its domain to GUI and swap Emissive with Color (see the picture in the bottom of the page under section GUI Text).
5. Assigning the material
The last step is to assign the created material asset to the material property of the text render actor (or custom material if used for GUI control type).
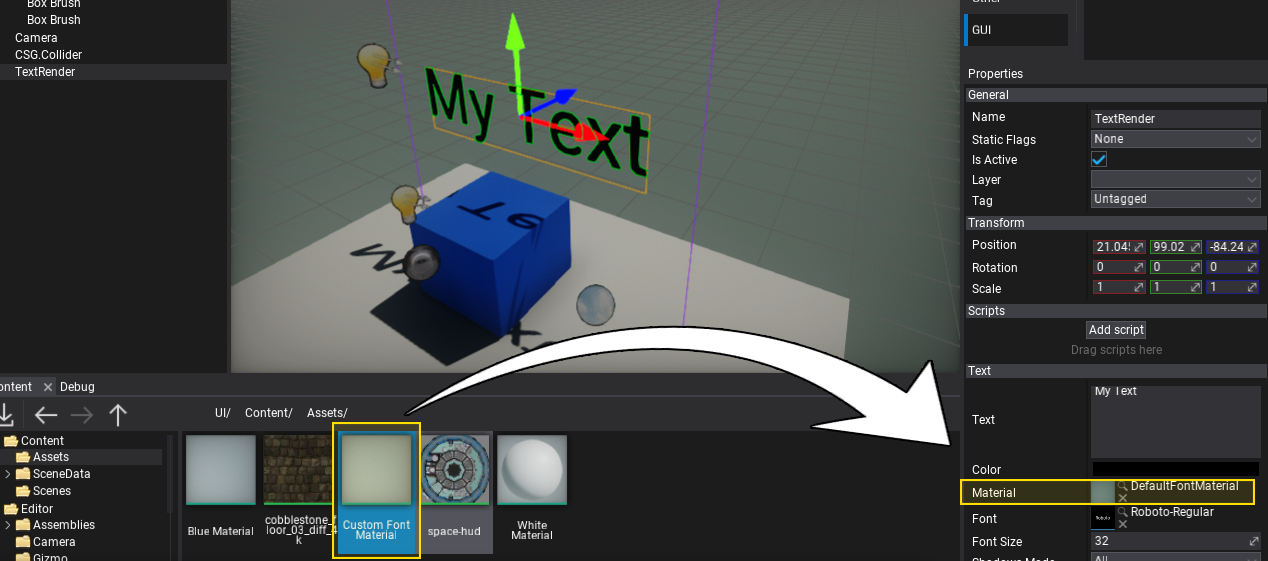
6. See the results!
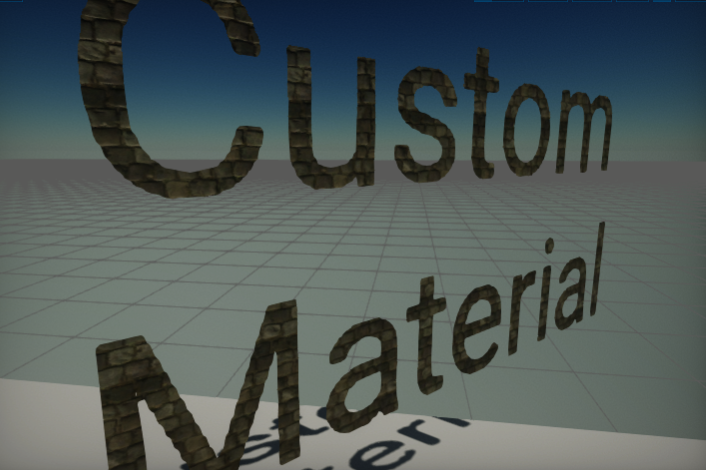
GUI Text
If you want to use the custom material for rendering text inside the GUI (eg. on Label or Button controls) then you should follow the tutorial and additionally set the material domain to GUI and use Emissive/Mask inputs.
See the following example:
