HOWTO: Render a camera to a texture
Flax Engine offers a very wide range of customization that can be made to extend the rendering pipeline. One of them is rendering a scene using a custom camera right to the render target. Then presenting it on an object surface.
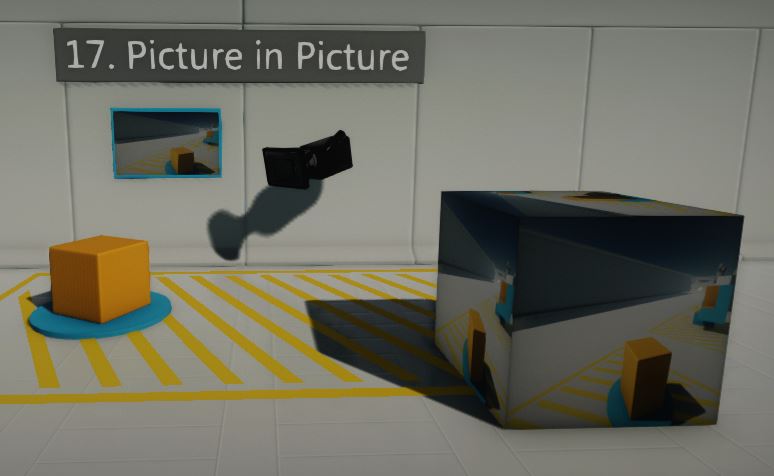
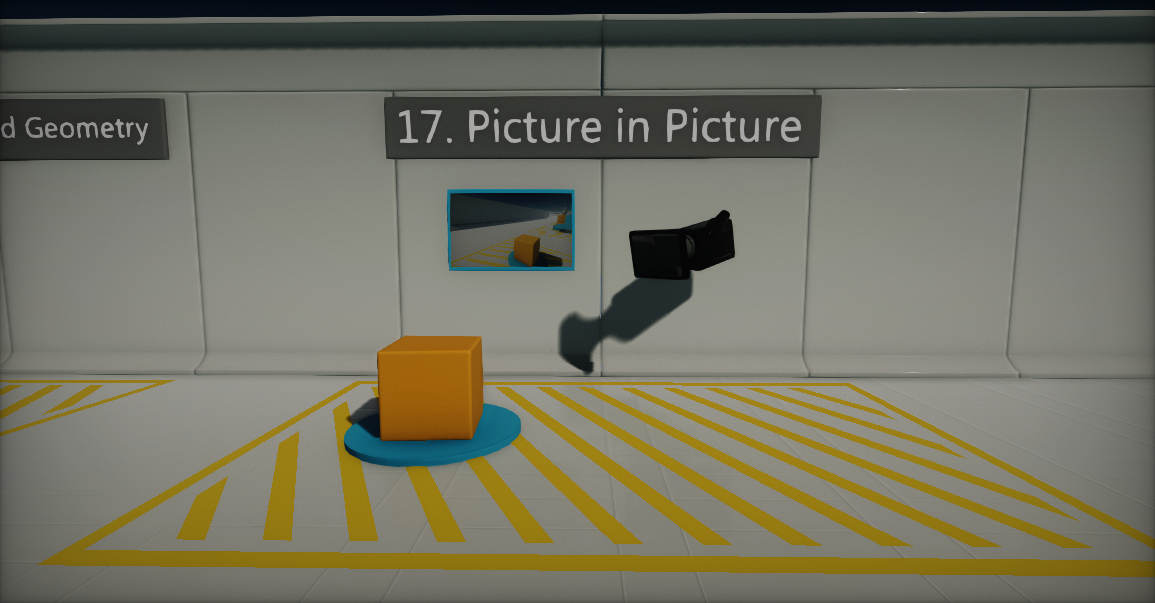
In this tutorial you will learn how to achieve the picture-in-picture effect:
Creating the material
The first step is to create a dedicated material for the TV object. It will be used to show the rendered scene picture on a surface so the player can see it. To do that follow these simple steps:
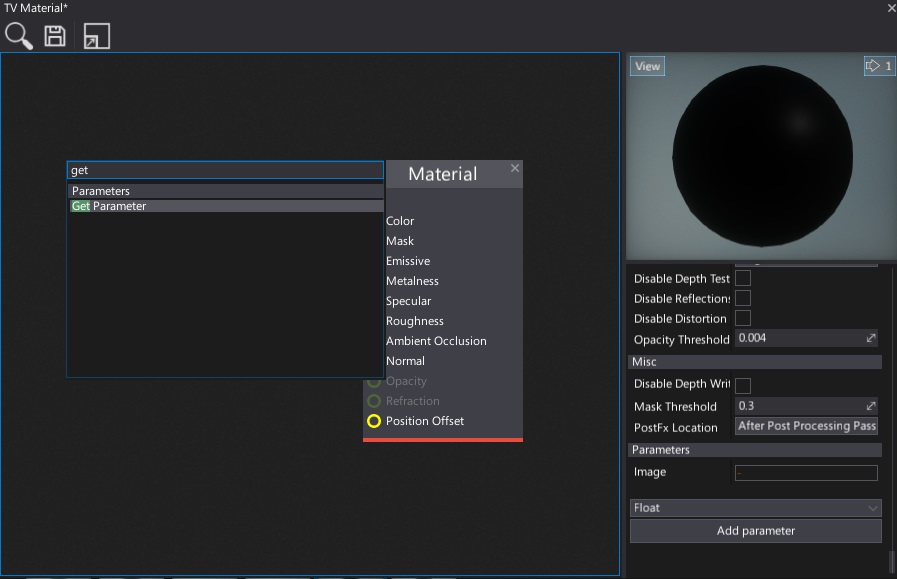
Create a new empty material and name it
TV Material(see the Materials Basics page to learn how to do it)Open it in the Material Editor (double-click on the asset)
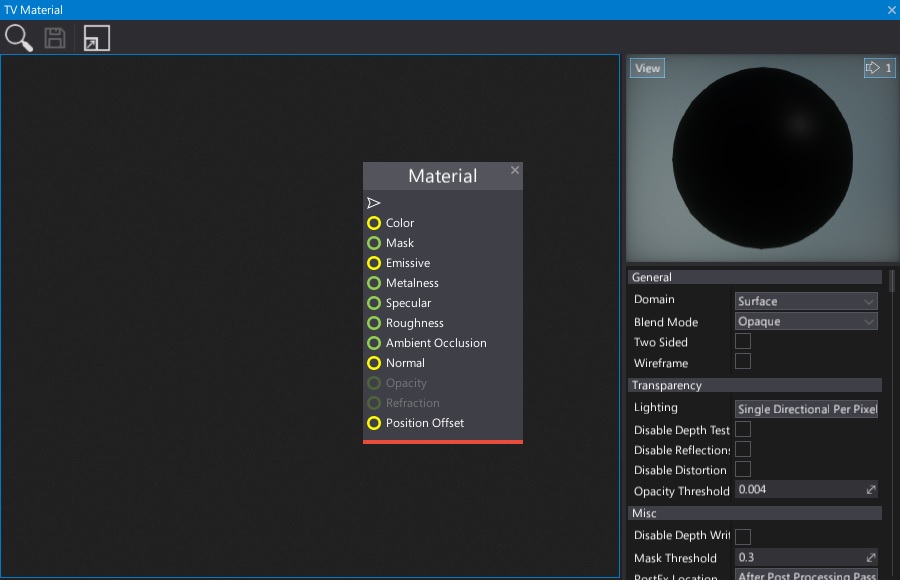
Scroll down in the Properties Panel, select the GPU Texture option from the bottom drop down menu and press the Add parameter button
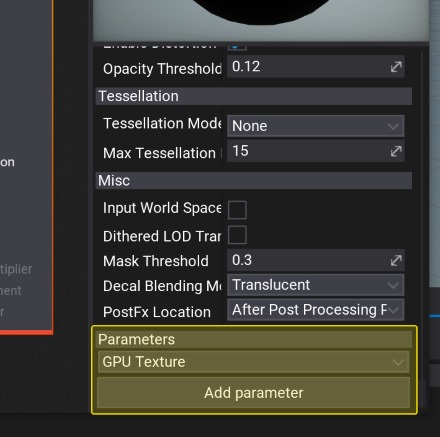
Right-click on the newly created New parameter, select the option Rename and set its name to Image
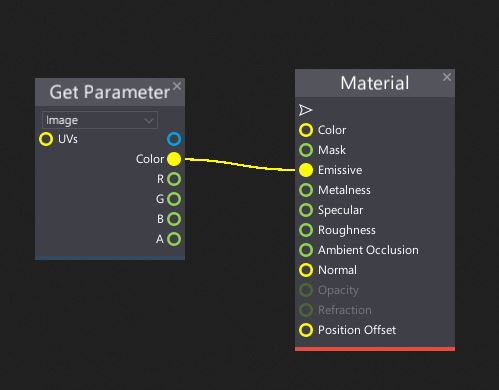
Right-click on a Surface background and create a Get Parameter node (to learn more about creating nodes see the Material Editor page)
Select the Image parameter from the dropdown menu of that node and connect its Color box with the Material Emissive input.
Save the material asset
Creating a script
Now it's time to write a simple script that will use a camera and render it to the texture (which is also called a render target).
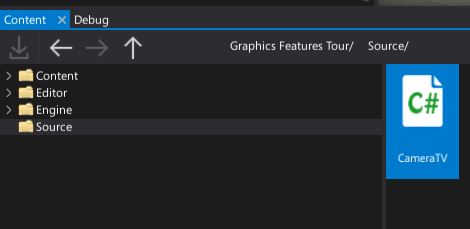
Navigate to the Source/Game directory of your project and create new C# script named CameraTV
Open the script
Write the following code and save it
using System;
using FlaxEngine;

public class CameraTV : Script
{
    public Camera Cam;
    public MaterialBase Material;

    [Limit(1, 2000)]
    public Float2 Resolution
    {
        get => _resolution;
        set
        {
            value = Float2.Clamp(value, new Float2(1), new Float2(2000));
            if (_resolution != value)
            {
                _resolution = value;
                if (_output)
                {
                    // Resize backbuffer
                    UpdateOutput();
                }
            }
        }
    }

    public float ViewDistance = 2000;

    private Float2 _resolution = new Float2(640, 374);
    private GPUTexture _output;
    private SceneRenderTask _task;
    private MaterialInstance _material;

    private void UpdateOutput()
    {
        var desc = GPUTextureDescription.New2D(
            (int)_resolution.X,
            (int)_resolution.Y,
            PixelFormat.R8G8B8A8_UNorm);
        _output.Init(ref desc);
    }

    public override void OnEnable()
    {
        // Create backbuffer
        if (_output == null)
            _output = new GPUTexture();
        UpdateOutput();

        // Create rendering task
        if (_task == null)
            _task = new SceneRenderTask();
        _task.Order = -100;
        _task.Camera = Cam;
        _task.Output = _output;
        _task.ViewFlags =
            ViewFlags.Reflections |
            ViewFlags.Decals |
            ViewFlags.AO |
            ViewFlags.GI |
            ViewFlags.DirectionalLights |
            ViewFlags.PointLights |
            ViewFlags.SpotLights |
            ViewFlags.SkyLights |
            ViewFlags.Sky |
            ViewFlags.Shadows |
            ViewFlags.SpecularLight |
            ViewFlags.CustomPostProcess |
            ViewFlags.ToneMapping;
        _task.Enabled = false;

        if (Material && _material == null)
        {
            // Use dynamic material instance
            if (Material.WaitForLoaded())
                throw new Exception("Failed to load material.");
            _material = Material.CreateVirtualInstance();

            // Set render task output to draw on model
            _material.SetParameterValue("Image", _output);

            // Bind material to parent model
            if (Actor is StaticModel staticModel && staticModel.Model)
            {
                staticModel.Model.WaitForLoaded();
                staticModel.SetMaterial(0, _material);
            }
        }

        _task.Enabled = true;
    }

    public override void OnUpdate()
    {
        // Optimize by disabling rendering if main game view is far too far
        var mainView = MainRenderTask.Instance.View;
        _task.Enabled = Vector3.Distance(Actor.Position, mainView.Origin + mainView.Position) <= ViewDistance;
    }

    public override void OnDisable()
    {
        // Unbind temporary material
        if (Actor is StaticModel staticModel && staticModel.Model && staticModel.Model.IsLoaded)
            staticModel.SetMaterial(0, Material);

        // Ensure to cleanup resources
        Destroy(ref _task);
        Destroy(ref _output);
        Destroy(ref _material);
    }
}
Preparing objects
The final step is to set up a scene and link all this stuff together.
- Create a new Camera object and place it in your scene
Add an object that will present a camera image. You can use a Cube model from the Toolbox window

Select the spawned object and add the CameraTV script to it by simply draging it
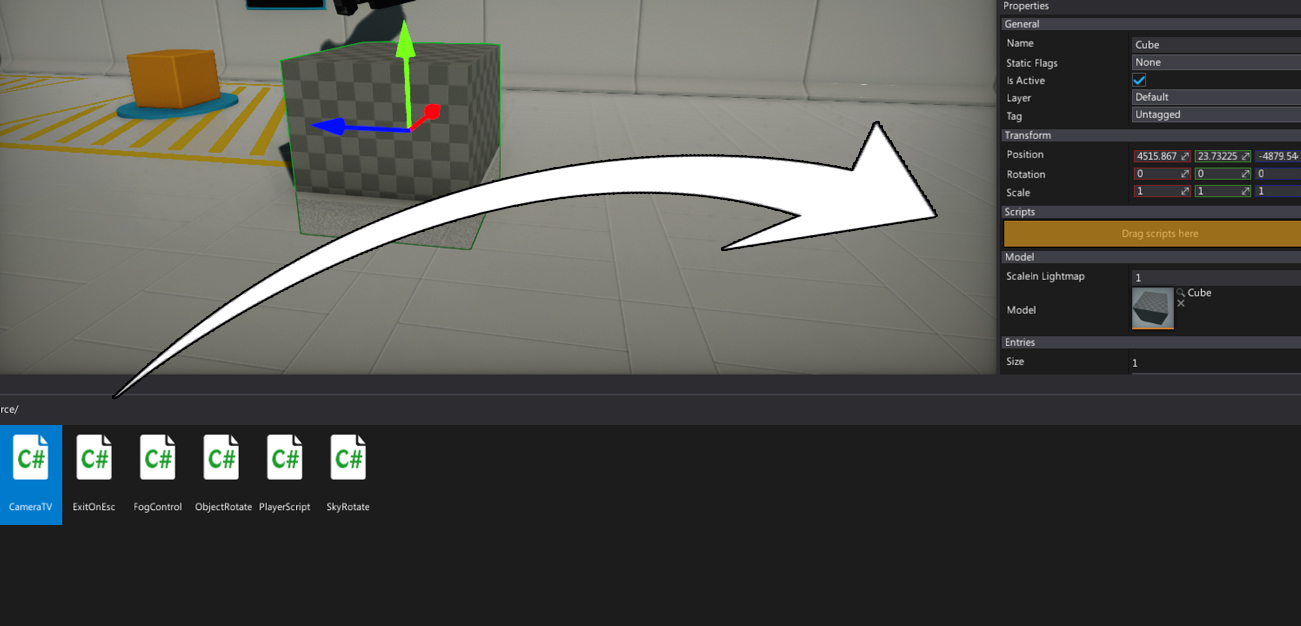
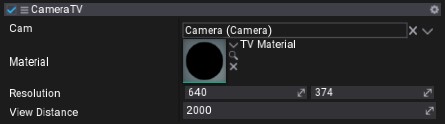
Set a reference to the camera and material for the script properties Cam and Material. You can also adjust the resolution (in pixels).
Hit Play and see the results!